Portraits With Madeleine Keating
in Portraits, Photography

There are few things that stick out when I think of my childhood in Hong Kong. 1) That one time I was wandering around while my mom was watching my sister's ballet recital. I was outside by myself and suddenly this old man took my hand and said "oh your mom is this way." He was totally pointing at a different direction. THANKFULLY I was able to pull away and ran back to my mom. 2) My teacher yelled at me because I had told her I needed to go to the restroom and after I was done, I bumped into my aunt. She asked me to go look for my cousin...or something and so I did. Then moments later my teacher found me and started yelling at me for wandering off. And before I could explain I was already crying. 3) My elementary school in Hong Kong sold fried fish balls in the cafe and everyday I wanted it soooo bad. But my dad wouldn't let me buy any. He would tell that the fish balls were dirty, the cooks would accidentally drop them on the ground and would step of them and then would pick them up and put it back into the pot..etc....etc.....etc. I THINK I only ate it once, ever, in Hong Kong. It wasn't until I had moved to NYC, like 18 years later, that I finally bought fried fish balls from a street cart. 18 years! There are no Chinese food carts in LA so yeah not until moving to NYC. I felt like a rebel, buying that skewer of fish balls.
So this recipe you can definitely use other balls. Beef, squid, cuttlefish, shrimp, pork filled. I was going to using the plain old pre-fried fish balls but these fish shaped fish cakes caught my eyes. And the addition of rice noodles (tube shaped) is a classic breakfast.


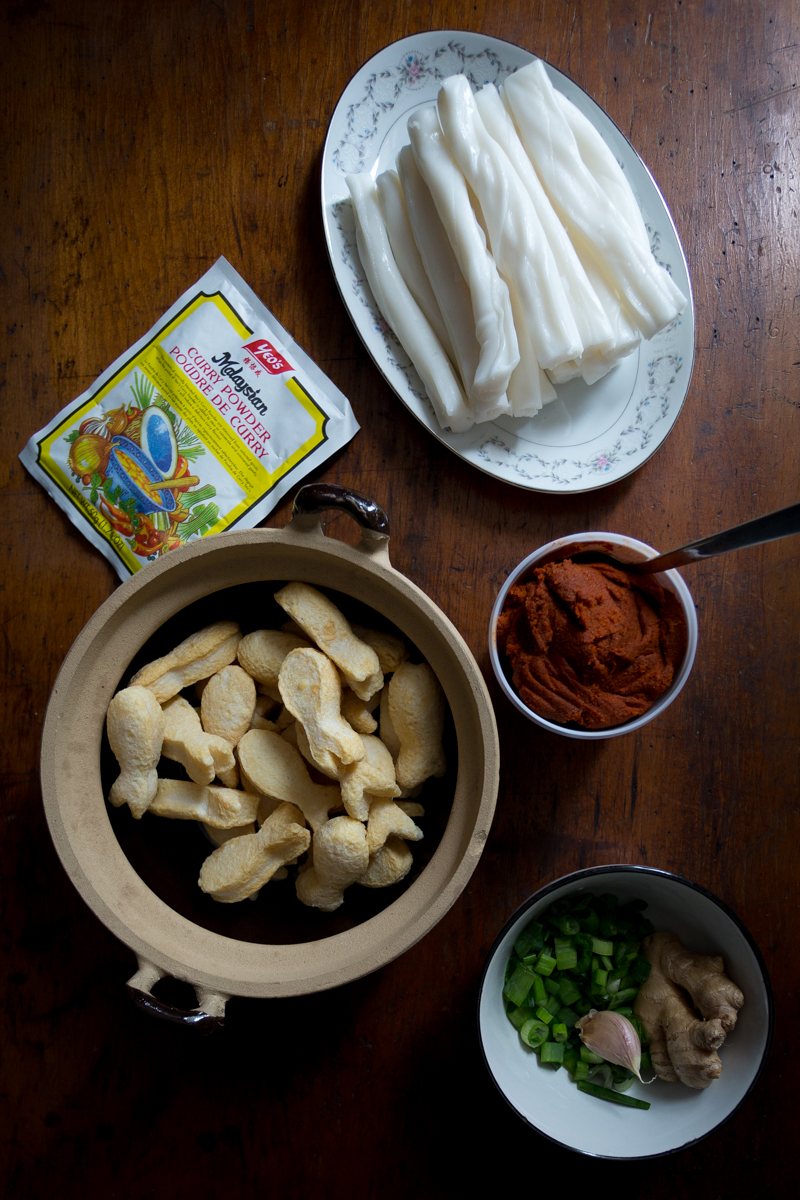

1 package of fish balls 1 package of rice noodles 2 tablespoon curry paste 2 cloves of garlic, minced 1 tablespoon grated ginger Couple scallions, sliced or diced Chicken stock 1 tablespoon flour Oil Salt + pepper Soy sauce Sesame oil
Add oil into a pot, over medium flames. When the oil is hot, add the grated ginger and minced garlic. Saute for 45secs or until fragrant.
Add curry paste. Stir it, incorporate into the oil, cook for a minute.
Toss in the balls (or fish shaped fish cakes). Mix a bit. Add in the chicken stock. You want the liquid to barely cover all of the fish balls. If it's not enough, add water. Bring it to a boil, lower the flames, and let simmer for 10mins. If you are using frozen balls, simmer the fish balls till they are warm inside.
In a separate bowl, combine couple tablespoons of curry sauce from the pot with a tablespoon of flour. Mix until no more lumps of flour. Add mixture to pot of fish balls. Stir and let simmer for another minute or so. Add a tablespoon of soy sauce and a dash sesame oil.
Taste the sauce and season to taste.
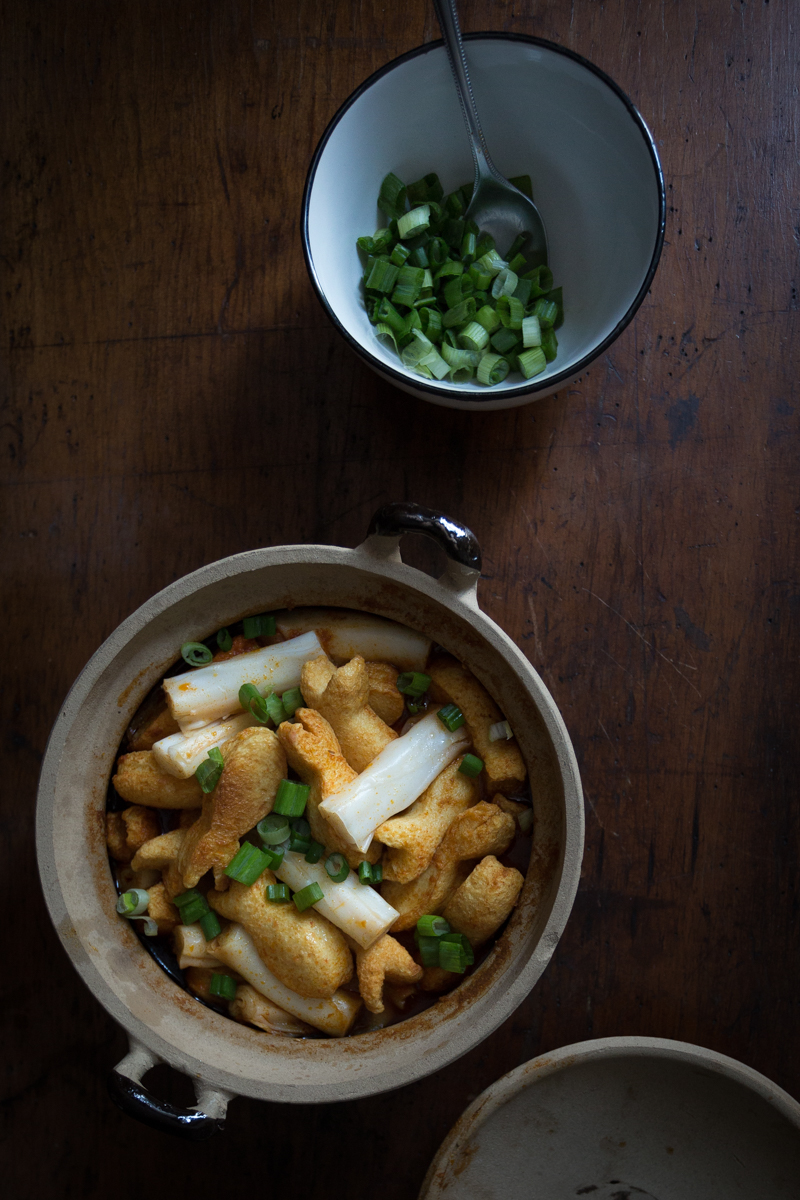
Add rice noodles. Add as much as you like. My pot was only big enough for half the package of rice noodles. Give everything a quick mix. The rice noodles cook quick, so keep your eye on them. I used a fork to poke at them to see if the center has softened. You don't want to over cook the noodles or they will absorb too much liquid and become way too soft.
Finish with scallions

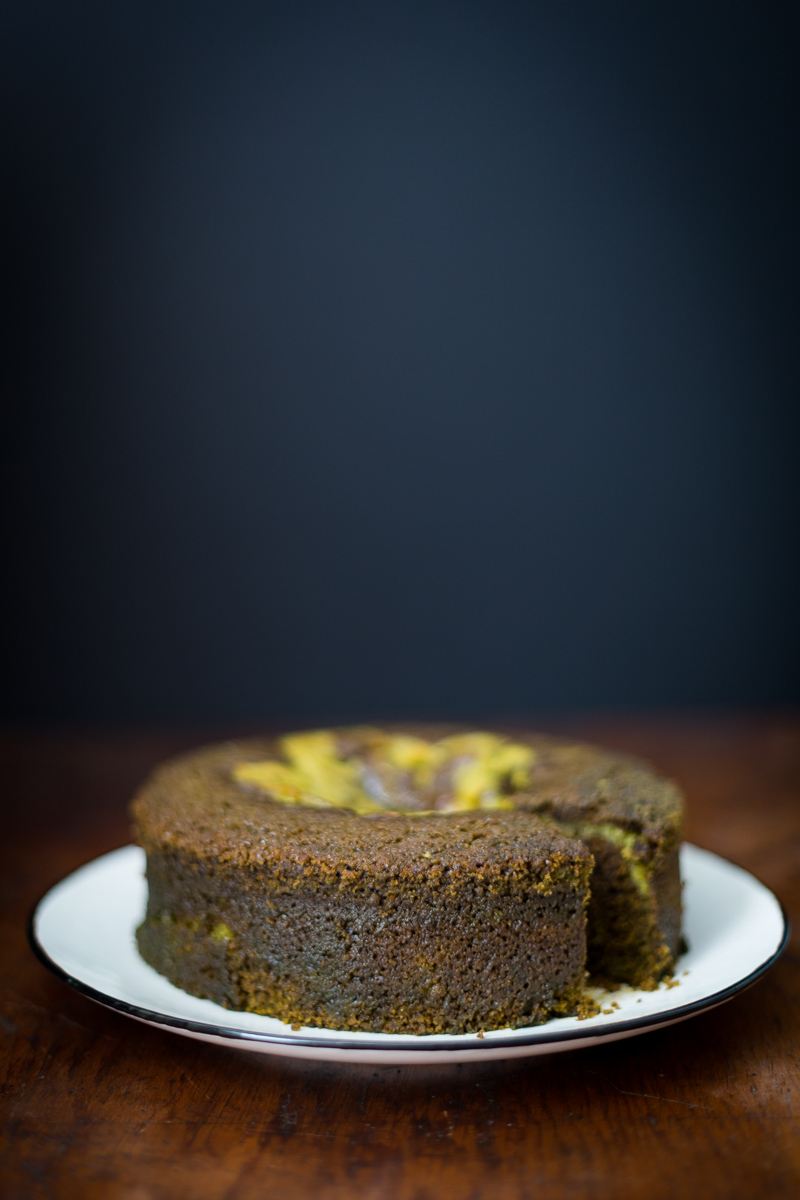
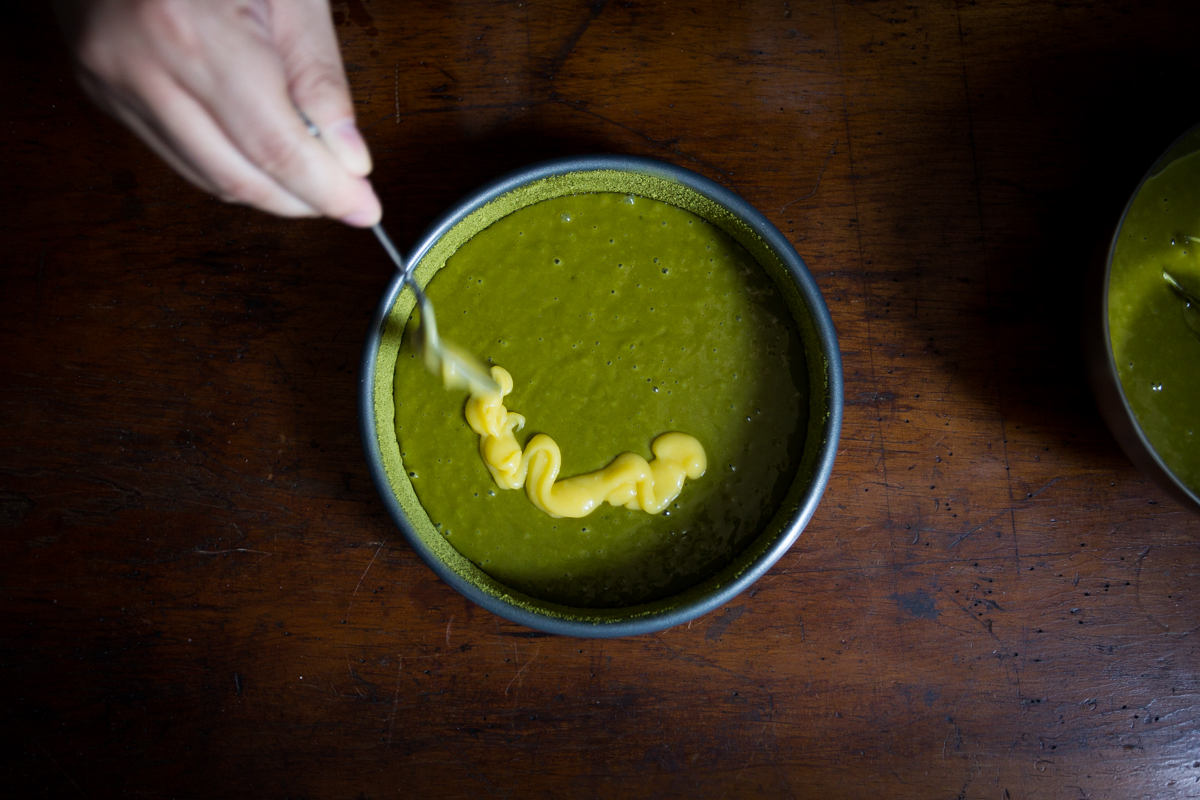
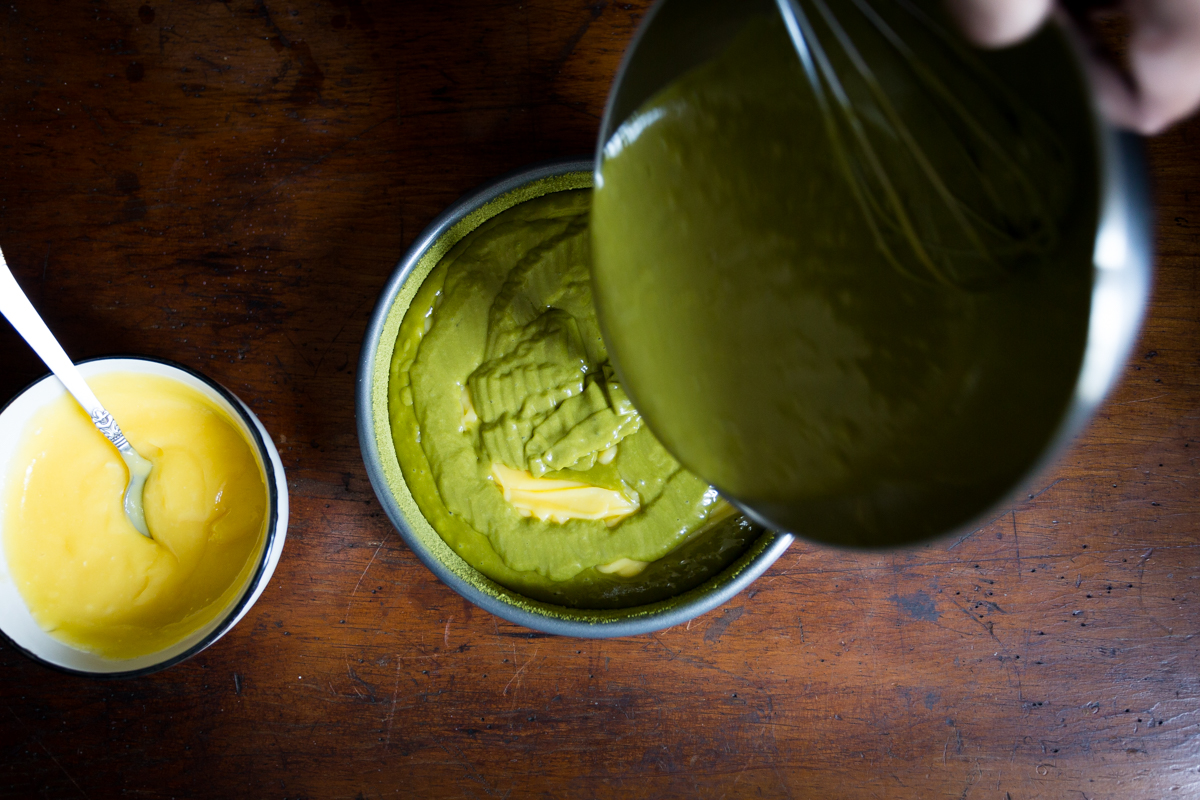
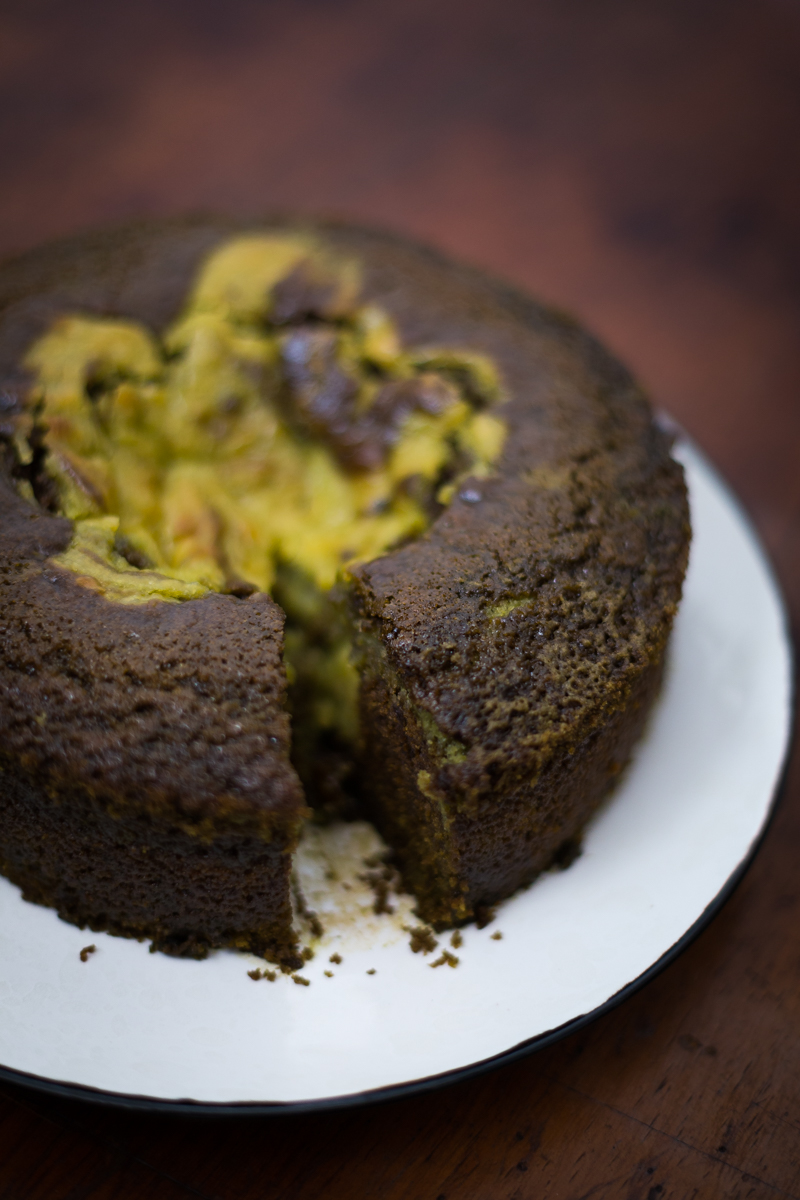
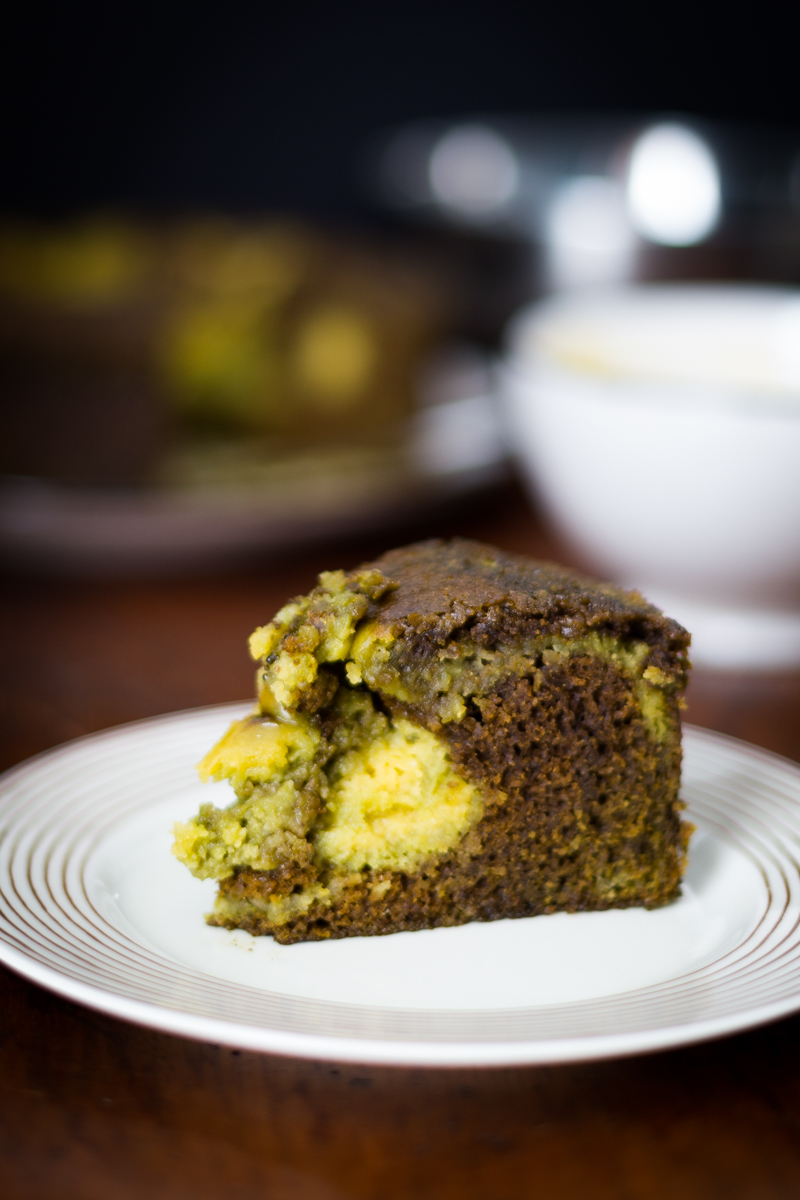
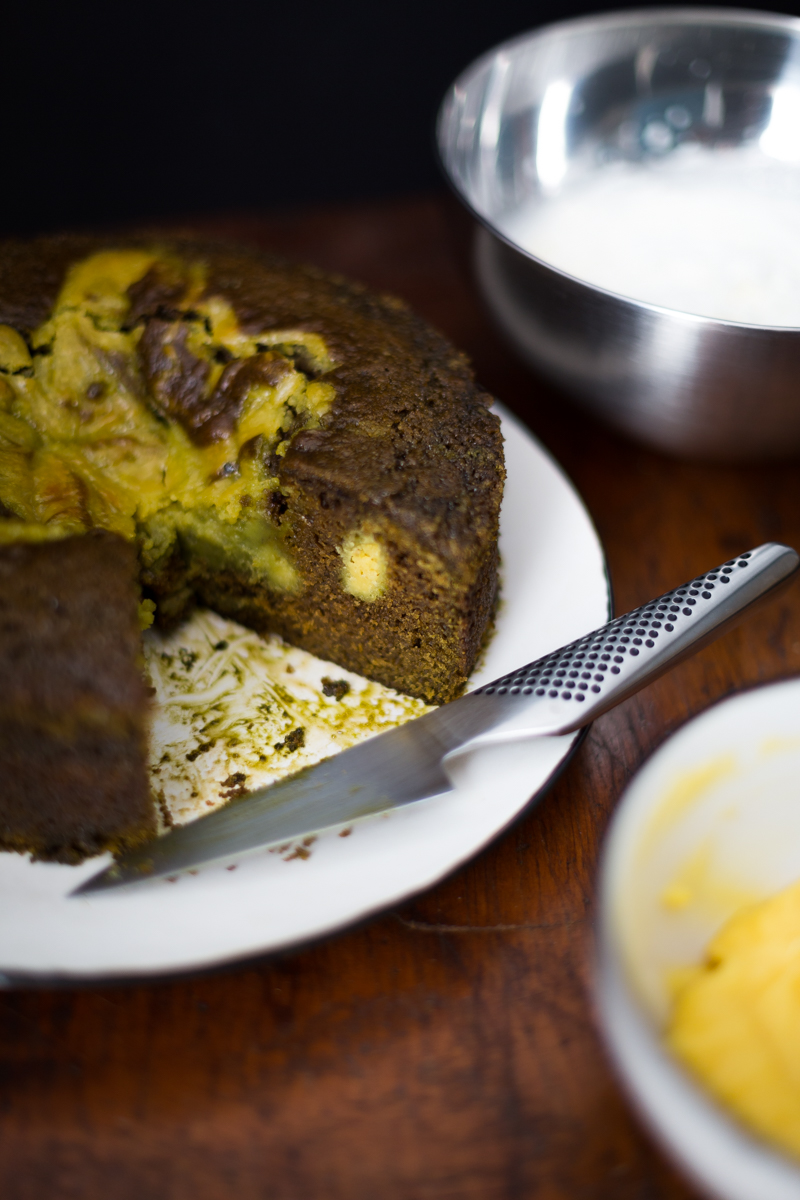
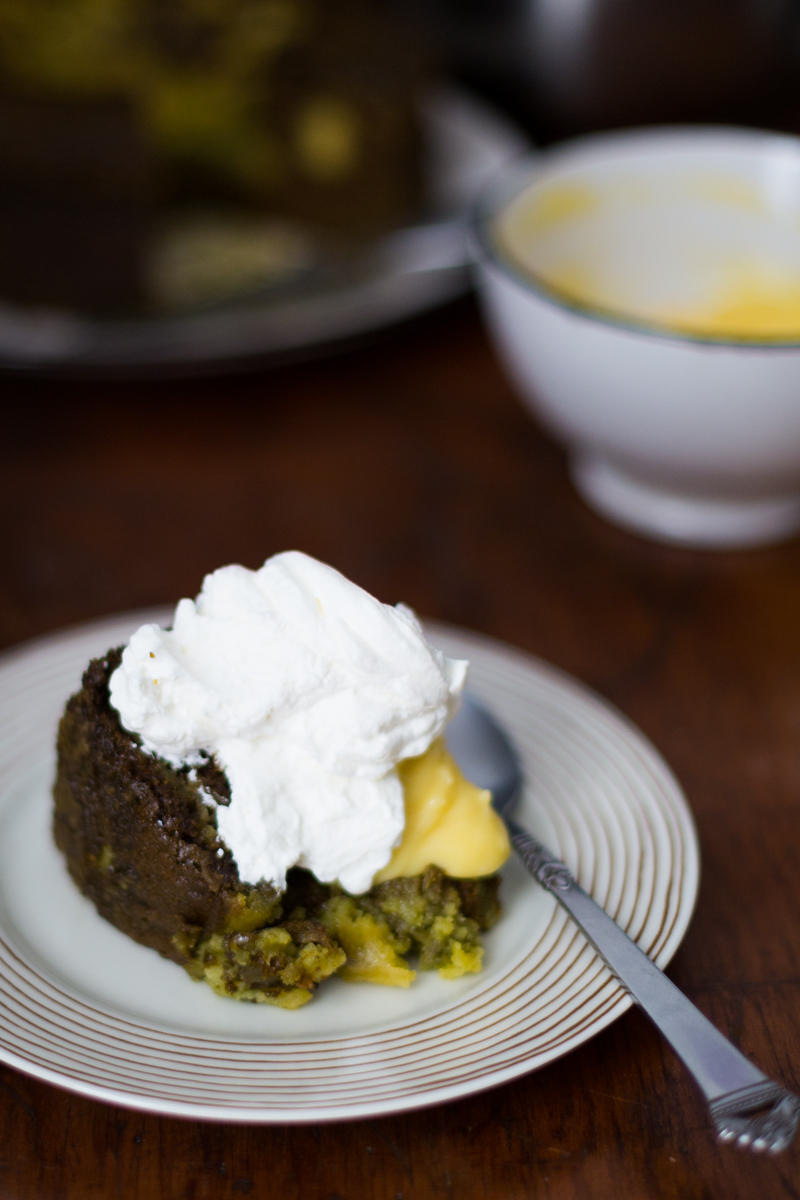
There's a reason why I don't bake. It takes too much effort and you REALLY have to follow the recipe. I tend to not thoroughly read the recipe, I'll skim through the recipe and just sort of get the bigger picture. So when I tried to make Molly's matcha cake, I totally failed. I totally failed at reading the very first sentence..."for an 8-inch cake, grease two 8-inch round cake pans and line the bottoms with parchment." Instead of using TWO cake pans, I used only one and created this massive dense thing that my friend said looks like cat food. I realized the mistake when the cake wasn't done baking at 28mins. Another lesson I learned is to not put a bunch of yuzu curd in the middle of the cake or else it'll just collapse.
Though in the end, this was still a pretty tasty cake.
You can head over to Molly's site for the matcha cake recipe. As for the yuzu curd, I used the lemon curd recipe from Epicurious and just replaced the lemon juice with yuzu juice.


Happy Chinese New Year! I started 2016 with a food project. I wanted people to cook/bake/make Chinese pastries, I wanted people to get excited about Chinese pastries like they do with doughnuts and pies and cupcakes. So I thought one of the best ways was to get the food community...bloggers, photographers, instagrammers involved. There are so much great Chinese treats out there and people should know about them. Here's what I made or attempted to make. The mini chicken pie. Yeah, it looks NOTHING like the ones you find in a Chinese bakery, also the crust is totally wrong. I used the Four & Twenty Blackbirds pie crust recipe which is awesome and flaky but it should be more crumbly and cookie like. ALSO, I had spent days trying to find out how they shape the pies. In the end I made them more like mini chicken pot pies with the crimping and stuff. Now I'm tempted to go intern at a Chinese bakery just so I know how to properly make this.
But this as a Hong Kong chicken pie "inspired" creation, it's pretty darn tasty.
Did you make or bake something for my project? Remember to include the hashtag #bakewithdonny so I can see and please include a link in the comments below! Hopefully you have learned something cool from this project.


Makes 4 pies 1.5 lb chicken thighs (4 pieces) 1/2 onion diced 2 cloves of garlic grated 1 teaspoon grated ginger 2 tablespoons xo sauce 1 tablespoon flour 1 tablespoon soy sauce 1 teaspoon sesame oil 1 tablespoon fermented bean sauce (optional) A can of chicken stock 1 egg Oil Salt + pepper
First, make the pie crust. I used the Four & Twenty Blackbirds pie crust recipe. I made enough for a double crust pie. When the dough is resting in the fridge, make the filling.
Pre-heat the oven, 350 degrees.
Remove the skin from the thighs and lay them flat on a sheet pan. Season both sides. Then lay a piece of parchment paper on top follow by another pan...follow by something heavy (also oven safe). This is to keep the skin flat. Put the pieces of skin in the oven and bake for 40mins. When they're done, place the skins onto paper towels to soak up the oil and then dice them up for sprinkling.
Remove the bone from the thighs and cut up the meat into 1/2 inch cubes.
In a pan on medium high heat, add some oil. Toss in the chicken and cook till you don't see any pink on the outside. Add in the diced onion and cook for couple minutes. Add in garlic and ginger. Add in all the sauces (xo sauce, sesame oil, soy sauce, fermented bean sauce). Then season to taste.
*Note: The xo sauce I bought is not the same one I used to buy. I couldn't find the brand I wanted and settled on another brand. The jar that I got isn't as strong in the xo sauce flavor so after tasting the filling, I added another tablespoon. I suggest you give the filling a taste as well and tweak as you like. You might want more fermented bean sauce flavor or maybe more sesame oil flavor.
Add the flour to the filling mixture, stir and add the chicken stock. Let mixture simmer for few minutes. Then take it off the heat and let cool.
*Note: I only added enough stock to go half way up to the pieces of chicken. I didn't want it to get too saucy. If you like it more saucy, add more stock.
Increase the oven temperature to 375 degrees.
While the filling is cooling, roll out the dough. Line each mini pie pan with dough and some overhang. Use a fork and poke some holes in the dough. Spoon in the filling. Place another piece of dough on top and then crimp the edges.
Beat up 1 egg and brush all the pies with the egg. Put the pies into the oven and bake till golden brown, roughly 45-50mins. When the pies are just about to turn golden brown, sprinkle chicken skin on top. Finish baking.
Make a pot of oolong tea and eat a pie.